Rolling can provide great benefits both before and after a workout; however, rolling at the start of a workout is essential. Foam rolling before a workout decreases muscle density and sets the stage for a better warm-up. Rolling after a workout may aid in recovery from strenuous exercise. The nice thing about the foam roller is that it can be used on a daily basis. In fact, Clair and Amber Davies recommend trigger point work up to 12 times a day in situations of acute pain (2004).
How long an athlete or client rolls is also individual. In our setting we allow 5 to 10 minutes for soft tissue work at the beginning of the session before the warm-up.
Let’s now look at the primary areas of the body where athletes most benefit from foam rolling and the techniques used to get the best results. Although there are no hard and fast rules, a general rule of thumb is to do 10 slow rolls in each position. Often athletes or clients are encouraged to simply roll until the pain dissipates or disappears.
Foam Rolling the Gluteus Maximus and Hip Rotators
The hip rotators sit below the glutes. To roll the hips the athlete sits on the roller with a slight tilt toward the side to be rolled and moves from the iliac crest to the hip joint to address the glute max. To address the hip rotators more specifically, the leg is crossed to place the hip rotator group on stretch (see figure 5.1).
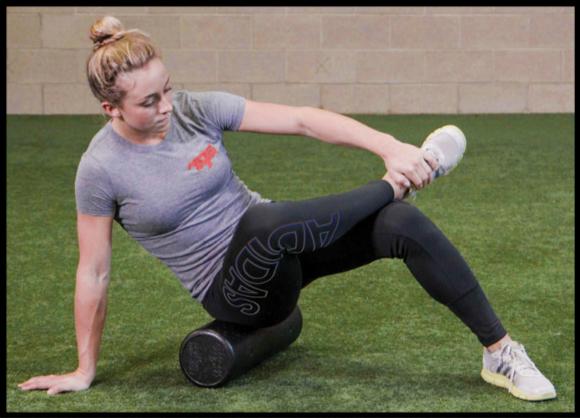
Gluteus maximus and hip rotators.
Foam Rolling the Low Back
After rolling the hips, the athlete rolls the lower back area (see figure 5.2), tilting slightly right or left to get into the spinal erectors and quadratus lumborum, a large triangular muscle layered under the spinal erectors. If you have any concerns about spinal injury, skip the low back. We have never had any issues with rolling the lumbar spine, but use common sense and proceed with caution.
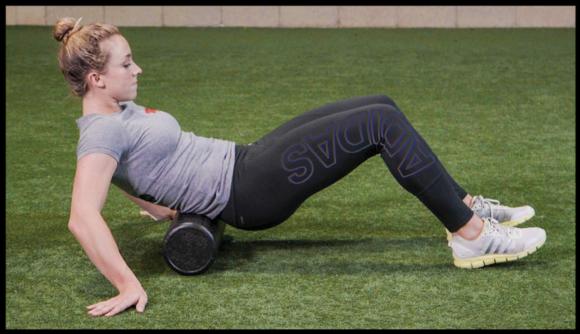
Low back.
Foam Rolling the Upper Back
The athlete moves up the body, continuing to roll the spinal erectors, the large layers of muscle on either side of the spine. When the athlete reaches the area between the shoulder blades, instruct him to try to touch the elbows together in front to get into the area known as the thoracic spine (see figure 5.3). Putting the elbows together places the shoulder blades as far apart as possible, allowing the roller to impact the lower trapezius and rhomboids.
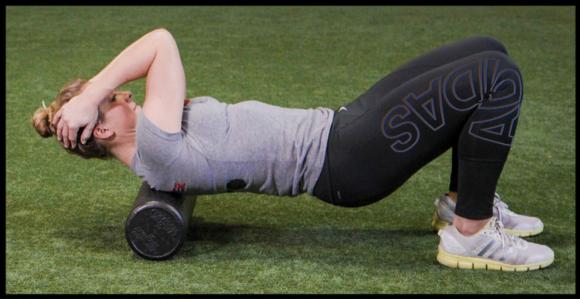
Upper back.
Foam Rolling the Tensor Fasciae Latae and Gluteus Medius
The TFL and gluteus medius, although small muscles, can be significant factors in anterior knee pain. To address the TFL the athlete begins with the body prone and the edge of the roller placed over the TFL, just below the iliac crest (see figure 5.4a). After working the TFL, the athlete turns 90 degrees to a side position and works from the hip joint to the iliac crest to address the gluteus medius (see figure 5.4b).
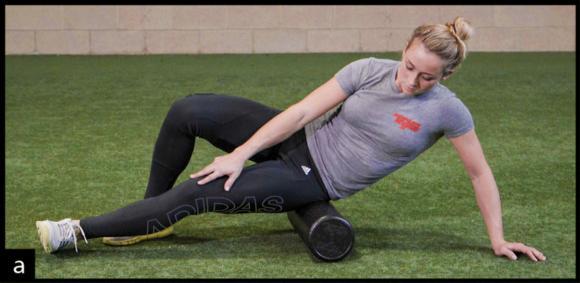
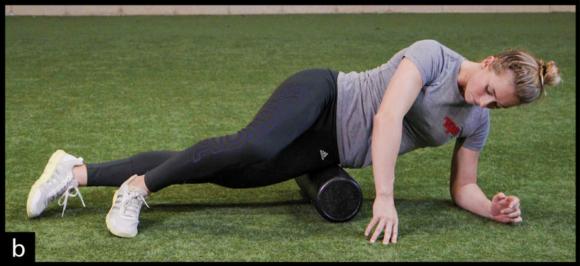
(a) Tensor fasciae latae and (b) gluteus medius.
Save
Save